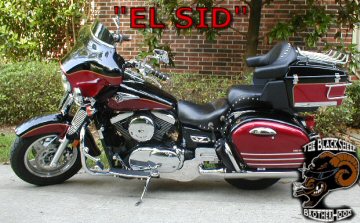
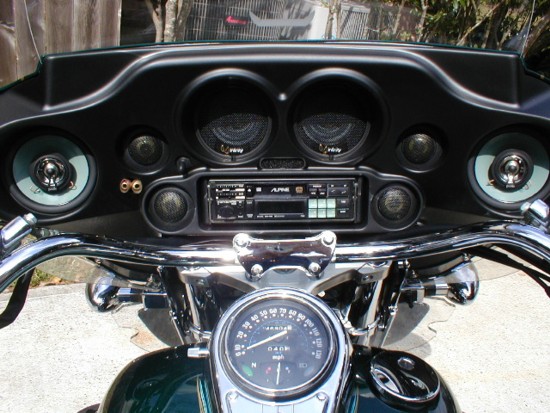
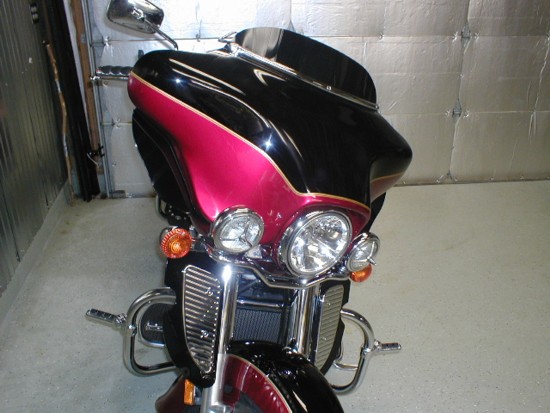
Sids Nomad is shown wearing a 96 and newer style HD inner and outer fairing.
The following instructions are for the installation of that fairing model
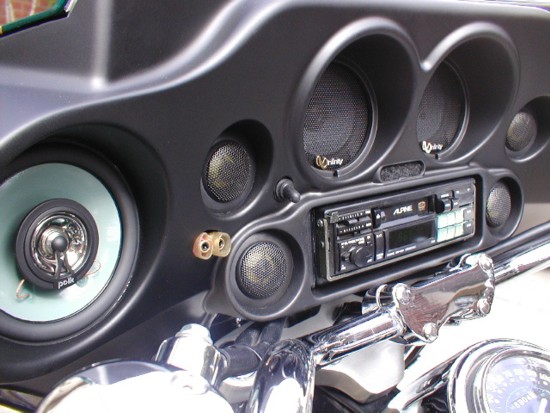
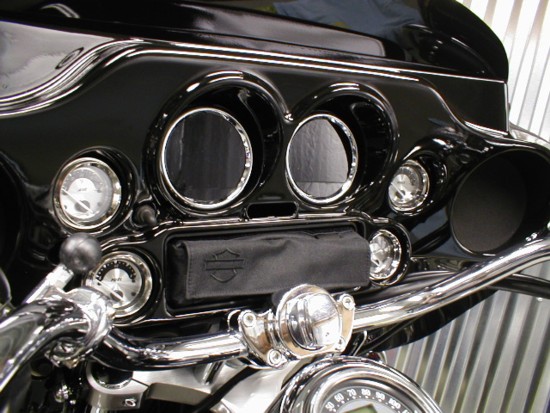
There are more complete photos of the fairing inner liner at the bottom of this page
Adapt
a HD fairing to a Nomad
Thanks
to Sid (El Sid) Findley
Sids Nomad is
shown wearing a 96 and newer style HD inner and outer fairing.
The following instructions are for the installation of that fairing model
There are more complete photos of the fairing inner liner at the bottom of this page
As many Nomad owners are aware there are several commercial offerings
available ( see them on this
fixit page) which bolt right to the bike, no modifications
necessary. You can also take a major shortcut by purchasing a set of Lee
Sido's brackets which turn mounting a HD fairing to a Nomad very close to
'plug and ride'. Some riders prefer the challenge (and the substantial savings) that comes from bolting a Harley
fairing to the Nomad which, as you will see, is possible with just a bit of effort. The following
instructions provided by Sid (El Sid) Findley will help you decide whether this is a project you feel comfortable
doing or maybe you'd be better off with the other options.
Please note there are
probably alternative mounting methods for this mod. This is just one of many possibilities. It was Sids first
try at doing this and as with many projects, there may be other steps you could take to wind up with the same setup
(or better).
At this time templates are not available for the brackets that need to be fabricated for mounting this fairing but you can get a very good idea from the following pictures what needs to be done. Hopefully bracket photos can be added soon.
Cheers,
Gadget
Sids Instructions
It needs to be stressed that before you begin
you will need to determine if you want to cut away the lower section/headlight opening of the '96 and newer HD
fairing for the stock Nomad headlight to clear. Or whether you want to mount the headlight trim ring and adjuster housing
directly to the HD fairing. I mounted my headlight directly to the fairing on my project. But I think you can also
trim out the lower portion of the fairing to clear the Nomad headlight if you choose to go that route. This would
allow you to leave your Nomad headlight and can intact. You should take this into consideration before beginning the project.
I also need to mention that my setup is built around 4X1 risers on my handlebars currently using the Thunder riser ignition. But there shouldn't be any problems doing this mod with your handlebars in the stock location. You just won't be able to use a tachometer due to the limited clearances forward of the riser cap.
The first thing you need to do is remove all the stock Nomad windshield and mounting hardware then remove the headlight and bucket. Now you have a clean front fork area to start with.
Click thumbnails for larger images
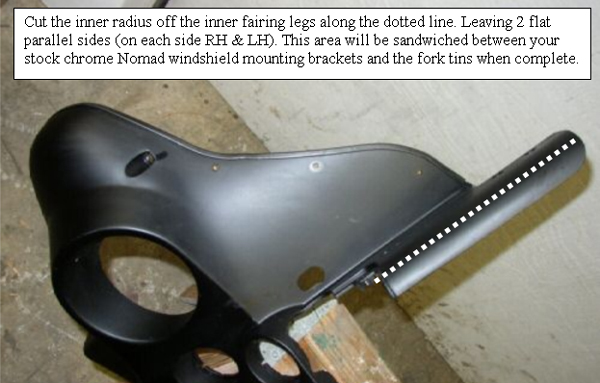
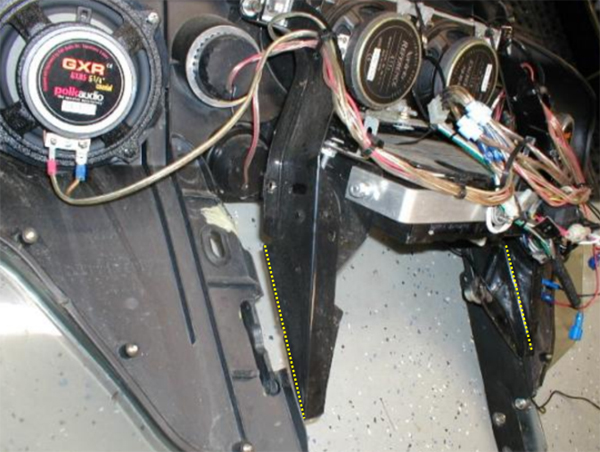
On the HD inner fairing, cut along the dotted line as shown above. This will leave you with two flat sides that will line up down the outer edges of your front fork tins. Now bolt the outer fairing to the inner fairing and sat the whole assembly up on top of the Nomad sliding the two inner fairing flats down alongside the Nomad forks
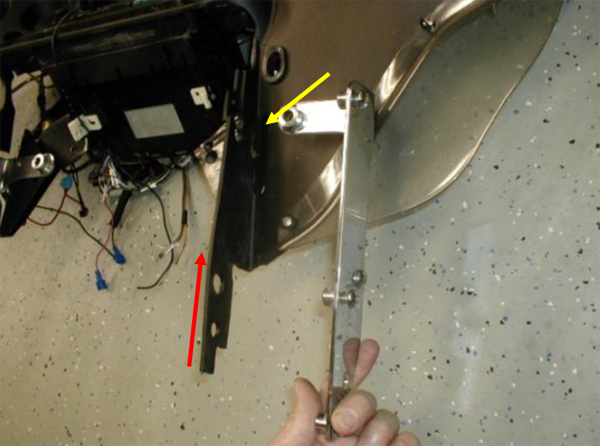
As you can see the inner radius is now cut off (red arrow area) the 2 lower sections leaving 2 flat sides. Now were going to start working on getting the stock Nomad windshield mounts integrated into the HD inner fairing. Well do this by cutting a notched hole in the area near the yellow arrow area.
 To make
this notched hole measure up from the bottom 3 and make your notch 3 in total length. I used a ½ drill
to start each end and then used a Dremel cutoff wheel to form the notch in between. This will be where your stock
outer Nomad windshield brackets slide through. Look at the picture below and you will see the additional cutting
required to get the Nomad bracket to slide through.
To make
this notched hole measure up from the bottom 3 and make your notch 3 in total length. I used a ½ drill
to start each end and then used a Dremel cutoff wheel to form the notch in between. This will be where your stock
outer Nomad windshield brackets slide through. Look at the picture below and you will see the additional cutting
required to get the Nomad bracket to slide through.
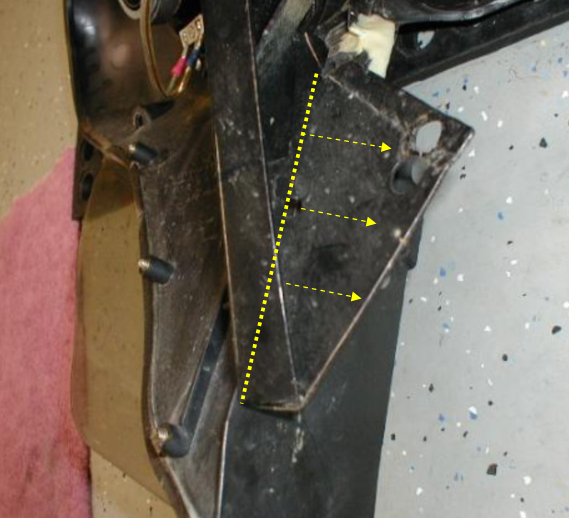
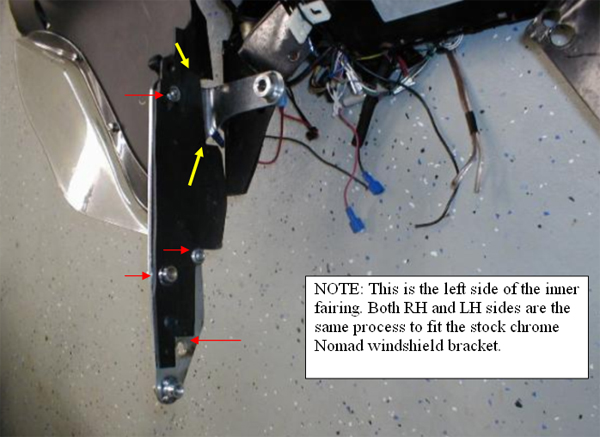 Once you have slid the bracket through the notch you created you will need to mark and drill
the holes marked with the 4 red arrows. These need to be a near perfect fit in each respective area. This will
create a large part of your front to back support of the inner fairing once it is mounted. Once you have drilled
these holes it should be a snap fit with the top section of the Nomad windshield bracket centered in the notch
you created.
Once you have slid the bracket through the notch you created you will need to mark and drill
the holes marked with the 4 red arrows. These need to be a near perfect fit in each respective area. This will
create a large part of your front to back support of the inner fairing once it is mounted. Once you have drilled
these holes it should be a snap fit with the top section of the Nomad windshield bracket centered in the notch
you created.
You will need to repeat this process for both sides. Take every precaution to make these
cuts and drilled holes as near perfect as you can. You only get one shot and they need to be spot on. Now the easy
part is done. <G>
Take what you have created and test fit it on the bike. Make any adjustments needed to this section at this time before you move on.
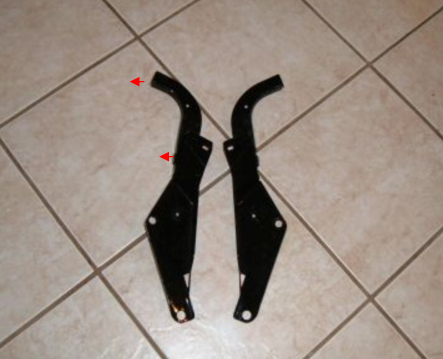 This is what the stock HD fairing mounting brackets look like. They are shown lying on their
sides. The red arrows show where they will bolt into the top backside of your inner HD fairing. They will need
to be heavily modified on the bottom to adapt them to the Nomad triple tree mounts. Take a look at the pics below
and see.
This is what the stock HD fairing mounting brackets look like. They are shown lying on their
sides. The red arrows show where they will bolt into the top backside of your inner HD fairing. They will need
to be heavily modified on the bottom to adapt them to the Nomad triple tree mounts. Take a look at the pics below
and see.
|
|
|
|
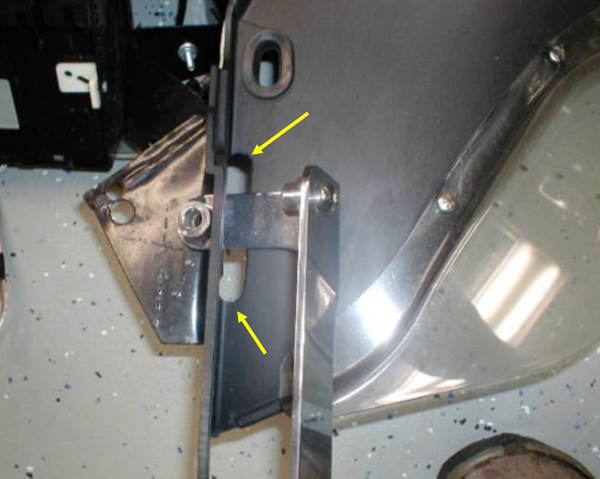
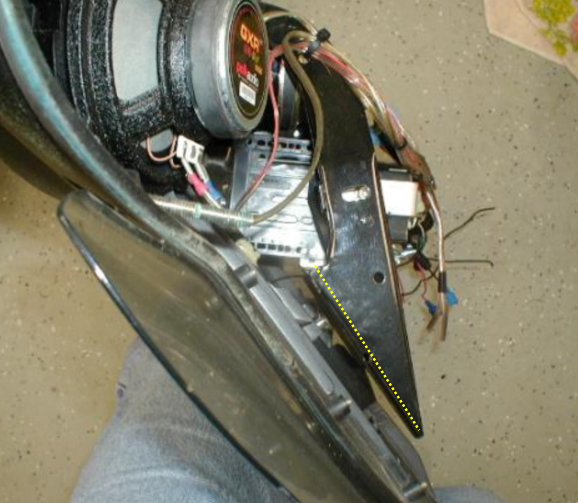
The yellow dotted lines show where the bottom of the HD brackets were bent inward to form a mounting surface which
will be bolted in between the front bolts of the Nomad windshield bracket as shown below. The stock Nomad chrome
windshield brackets are sandwiched below the black modified HD fairing brackets.
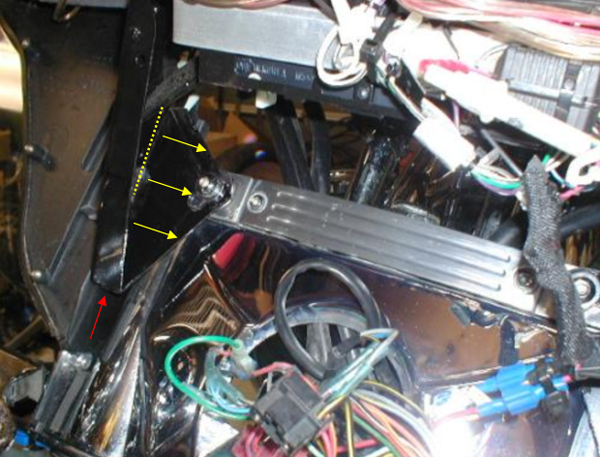 To determine where to cut these I made a cardboard
template of the side of the HD brackets and incrementally trimmed away the bottom until I got the contour to line
up with the lines of the stock Nomad windshield bracket. Then I marked a scribe on the black HD brackets (see yellow
dotted lines above) and bent the brackets inward to create what you see here. Once you bend in the section noted
by the yellow arrows you can trim off any excess areas. This was a very cumbersome process of trial and error.
Probably the hardest part of the whole project.
To determine where to cut these I made a cardboard
template of the side of the HD brackets and incrementally trimmed away the bottom until I got the contour to line
up with the lines of the stock Nomad windshield bracket. Then I marked a scribe on the black HD brackets (see yellow
dotted lines above) and bent the brackets inward to create what you see here. Once you bend in the section noted
by the yellow arrows you can trim off any excess areas. This was a very cumbersome process of trial and error.
Probably the hardest part of the whole project.
If you have a welder I suggest you run a bead along the bottom of the newly created edge on the bottom of the bracket (red arrow area).
Now snug up all the work you have done so far and test fit the outer fairing to the inner fairing. From here its a matter of details to clean up all the loose ends. Once you are satisfied with the overall setup its time to go back and look at the lower fork leg areas. If you cut your holes exact the inner fairing should have been a press fit to the stock chrome Nomad windshield brackets. The ones that bolt down alongside the forks.
No bolts are required in this area I cut two (¾) squares of ¼ thick rubber. I simply pressed these tightly in between the fork tins and the inside of the HD fairing lower legs. See pic below.
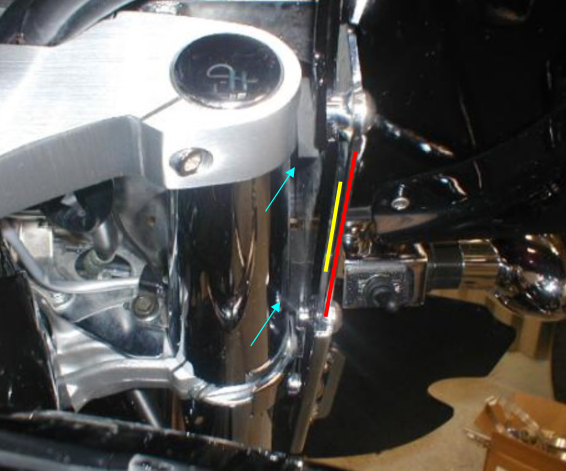 The rubber inserts (blue arrows in photo) help in several
ways. They force the inner fairing lower legs (yellow) out into the chrome stock Nomad windshield bracket (red).
They also snug everything up and help eliminate any vibration. They are pressed in to such a tight fit they will
not work their way out. Mine have lasted thousands of miles and never moved.
The rubber inserts (blue arrows in photo) help in several
ways. They force the inner fairing lower legs (yellow) out into the chrome stock Nomad windshield bracket (red).
They also snug everything up and help eliminate any vibration. They are pressed in to such a tight fit they will
not work their way out. Mine have lasted thousands of miles and never moved.
|
|
|
|
|
|
![]()