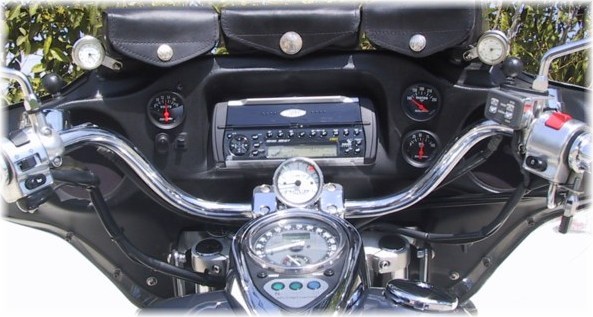
Voltmeter Left, Oil Pressure & Coolant Temperature Right
Monitor Your Engine's Health
Add Gauges
Gadget
Voltmeter Left, Oil Pressure & Coolant Temperature Right
If you've ever owned a hot rod, if you've ever owned a really cool car or if you've ever been, well, a "car guy" you've probably installed a gauge or two in your time. If you monitor your car engines health by checking temperature and oil pressure and your charging system and battery's condition by monitoring voltage then why not your bike? (BTW monitoring 'voltage' is far preferable to checking 'amps')
Installation of gauges on your Vulcan is really no different than on a car. You have the gauge unit and (except the voltmeter) sending units and the two are connected by a piece of wire. Don't even consider mechanical gauges for a bike, the sending units are connected via tubes full of oil or capillary tubes which really don't work well when the dashboard is wiggling back and forth with every turn.
If this sounds interesting you have some decisions to make.
1. Where and how are you going to mount your gauges? If you have a fairing it's pretty simple.
If not you might 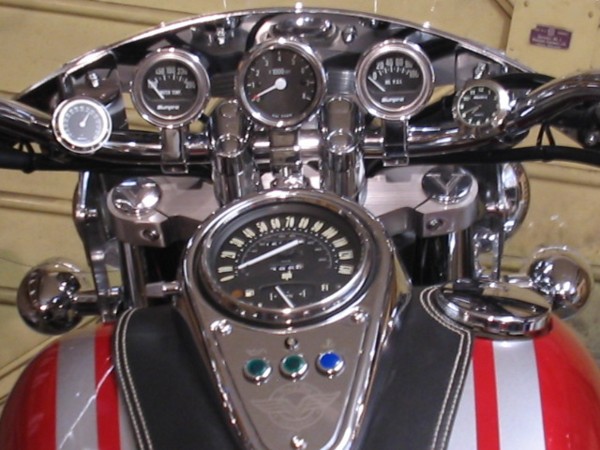 have to make some brackets like Sunny Bob did for his bike (left)
or let your fingers do the Googling to find ready built options like this. Choosing to make your own brackets is usually an excuse to buy a couple of
new tools or to get friendly with a local machinist.
have to make some brackets like Sunny Bob did for his bike (left)
or let your fingers do the Googling to find ready built options like this. Choosing to make your own brackets is usually an excuse to buy a couple of
new tools or to get friendly with a local machinist.
2. Figure out what style gauge you want. This could take some time just deciding whether you want a white or black face. Then decide the scale then the style. Here are links to some of the more popular manufacturers to make your shopping a little simpler. You'll discover one thing that makes a huge price difference is the lighting of the gauge. Some have internal lighting that shines through the gauge face (pricey) while others have the more traditional single bulb reflective illumination:
Once you've chosen a manufacturer and style you can start shopping. Check your local auto parts stores but remember do NOT purchase mechanical gauges. You need the type with electrical sending units. E-Bay is a good source, also check out EGauges and other online vendors.
All gauge types mount the instrument pretty much the same. You'll have connections for positive and negative power from the battery and (except voltmeter) a terminal for connecting the sending unit. Finding power is a piece o' cake since you have keyed positive (+) and negative (-) wiring in your headlight bucket*. A handy (+) wire to use is the running light. (-) is any black/yellow wire. Some gauges have their lighting wired up inside the housing (fancy) while others have a bulb that just mounts in the back of the housing. If you choose the latter you'll be using the same (+) and (-) connections as you're using to run the gauge.
*Some Eurospec Vulcans don't have 'always on' front lighting so no switched power in the headlight bucket. You may have to get power from the ignition switch.
NOTE: If you have a Premeux fairing or a style that tilts away from the rider toward the bottom you might
want to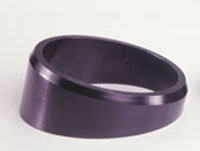 purchase a set
of angle adapters like these from Autometer . They aren't absolutely necessary but for most riders
the tops of the numbers won't be visible due to the tilt.
purchase a set
of angle adapters like these from Autometer . They aren't absolutely necessary but for most riders
the tops of the numbers won't be visible due to the tilt.
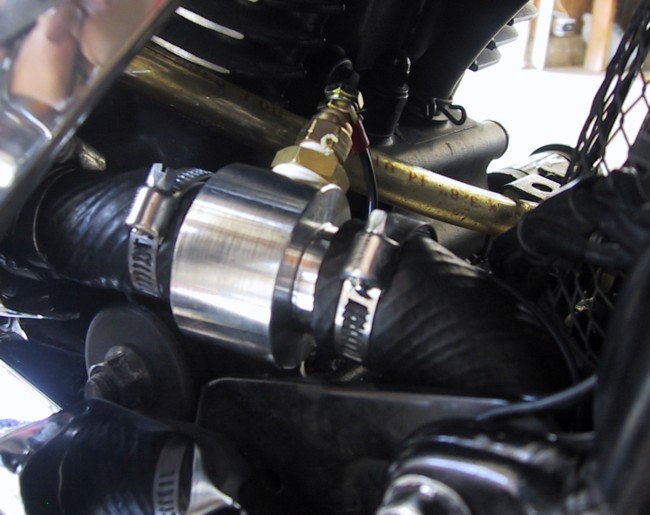
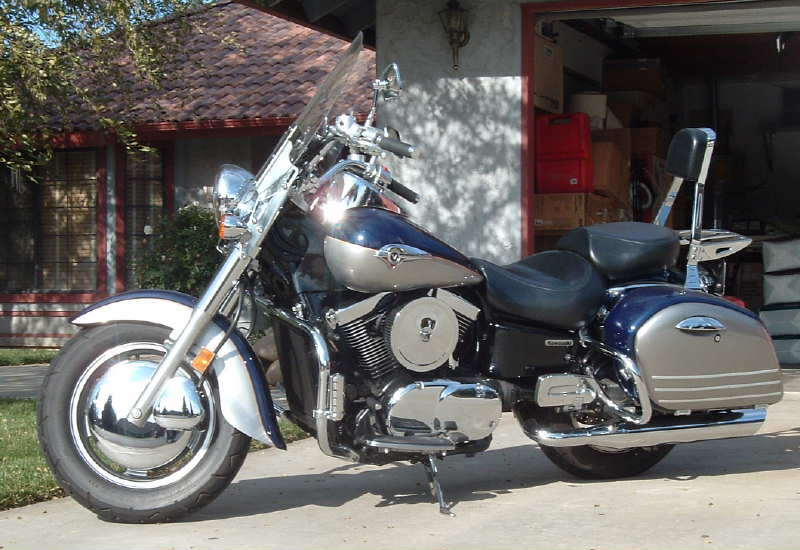
Ok, lets assume you've chosen the type, style and function(s) for the gauge(s) you want. It's time to do the install ! The bike shown in the following pictures is my Nomad. If you're adding gauges to a bike other than the water cooled 1500/1600 Vulcan you'll want to be sure you have the same type sending units and coolant hose described or modify the instructions as needed.
A Major Heads Up
I have purposely not shown the back sides of installed gauges because different manufacturers will have different setups. Be sure you read the instructions supplied with your gauge carefully to determine where all connections go. I can tell you Autometer gauges are not labeled on the gauge housing itself from the factory.
What You'll Need for almost all gauges
1. Your choice of gauge with electric sending unit (except voltmeter)
2. Lots of electrical connectors to attach wire to gauges 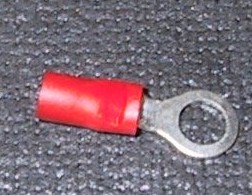
3. Assorted colors 18 gauge wire (for (+) (-) and sending unit connections
4. Brackets or fairing to put gauges in
How to do it
1. I printed pictures of gauges 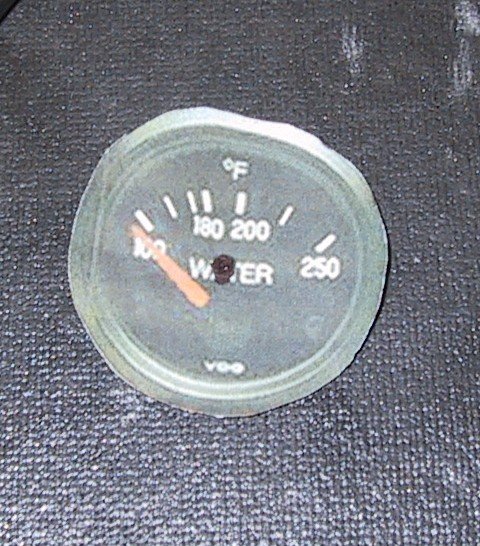 exactly 2" in diameter
and stuck them on the fairing with tape to check fit and location then used a compass
exactly 2" in diameter
and stuck them on the fairing with tape to check fit and location then used a compass 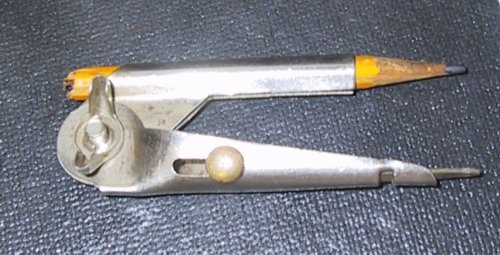 to mark exactly where the hole would be drilled. This took a lot of the guesswork out of the install and
guaranteed everything would fit.
to mark exactly where the hole would be drilled. This took a lot of the guesswork out of the install and
guaranteed everything would fit.
2. Disconnect negative battery cable. I know you're careful but stuff happens and you really don't need sparks flying and fuses blowing during the install.
3. If installing in a fairing use a 2" hole saw to drill out the inner liner. You'll have to sand
or file a little around the circumference for the gauge to slip in easily. 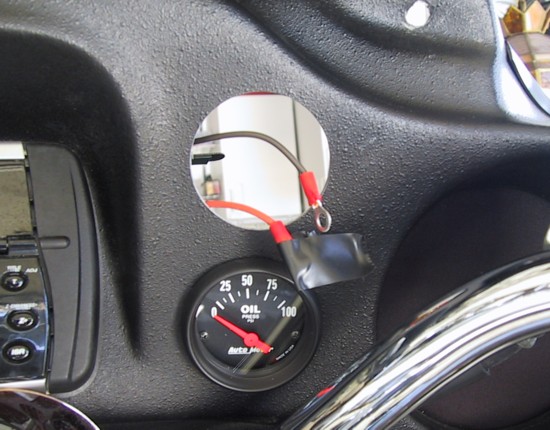 A Dremel tool with round sanding attachment is perfect for this.
3a. If installing with brackets it's your choice whether to install the gauge in the bracket first or the bracket to the bike first. It'll all depend how easy it is to reach wiring connections and attachment bolts.
4. Slip gauges into the holes and start wiring. You can use common (+) and (-) wires to link
all gauges. Just daisy chain from your (+) source to the (+) of the first gauge (using an eyelet connector)
then from the (+) of the first gauge to the second and so forth. Do the same with the (-) wire. 
|
Voltmeter
The simplest because there are no sending units to install. Just (+) and (-) wires and that's it ! 1. See above for all the prep and actual gauge install 2. Inside your headlight bucket locate a ground (-) wire which will be black with yellow stripe. Strip away a little bit of insulation from this wire and solder the wire you'll be connecting to the gauge to it. 3. Inside your headlight bucket locate a switched positive (+) wire. Handy for this is the wire that goes to the front running light/turn signal assembly. You'll notice there are bullet connectors for all of these so it's simple to check for power with the key on, no power with the key off. Strip away a bit of insulation on this wire and solder the wire you'll be connecting to the gauge to it. 4. Route your two wires (keeping track which is (+) and which is (-) to the gauge and connect to the appropriate posts. 5. Connect your battery and make sure there is no reading on the gauge. Turn on the key. You should be looking at a reading above 12 volts and under 13 (12.6 is normal for a fully charged battery). 6. Start the engine and run the rpm up to about 3000 rpm (typical highway cruise speed). A healthy charging system should be showing you about 14 volts. 7. Turn some stuff on. One accessory after the other and make sure your charging rate is still 14 volts. If it starts falling off you may have just reached the maximum output of your alternator. Turn things off until you're showing 14 volts again. 8. When you're satisfied everything works start installing your next gauge or button everything up and go for a ride. |
|
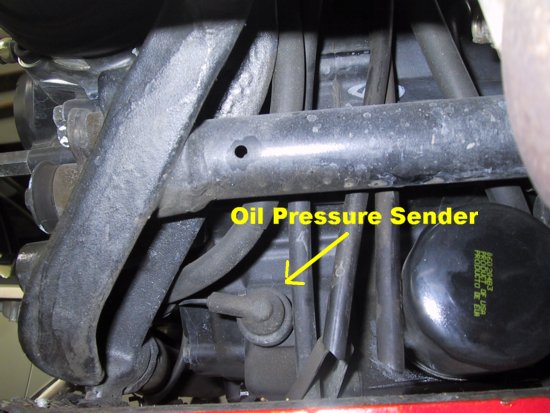
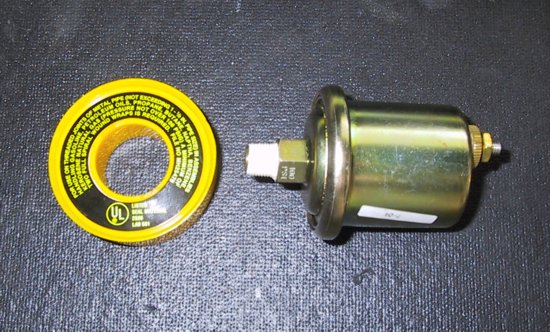
Oil Pressure Gauge
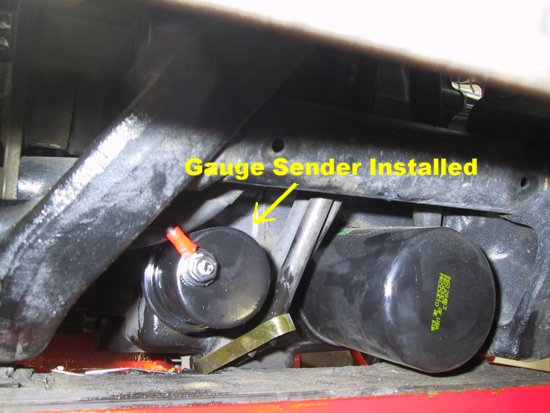
This is the second simplest gauge to install because Kawasaki has done most of the work for you. No worries about installing the sending unit. Kawasaki has used standard NPT threads for this so the new unit will thread right in, no drilling/tapping required. Simple ! 1. See above for all the prep and actual gauge install 2. Under your Vulcan 1500/1600 and to the left of the oil filter is the sensor for the idiot light.
Removal of the rubber boot over the stock sending unit will be much easier if you have a small flat blade
screwdriver handy to pry it off. You'll find the wire and a small nut underneath the rubber boot
3. Not absolutely necessary but a good precaution is to use Teflon tape on the aftermarket sending unit.
Who needs leaks right? If you really, really want to do it right use tape made especially for use with threads
that come in contact with oil. It's sold in a yellow container 4. Also at your option, paint the sending unit black so it's invisible from almost any angle.
The shiny brass color can barely be seen but a few extra minutes spent with a can of black spray paint looks better.
5. Route your 18 gauge wire from the sending unit to your gauge. The route is entirely up to you but you'll do a neater job if you remove the left side engine cover and follow the stock harness all the way to the front of the bike. 6. Connect the sending unit wire to the appropriate post on your gauge. 7. Tighten all connections 8. Turn on your key. The gauge should light. Start the engine. Don't be alarmed if the gauge goes all the way to 100 pounds. This is normal. 9. Everything works? Install your next gauge or button everything up and go for a ride. |
|
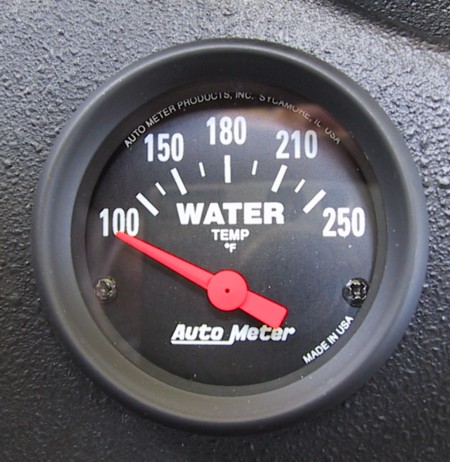
Coolant Temperature Gauge
This may be the toughest because you have to find a place to tap into the cooling system.
The simplest way to install 'most' temperature sensors is to screw
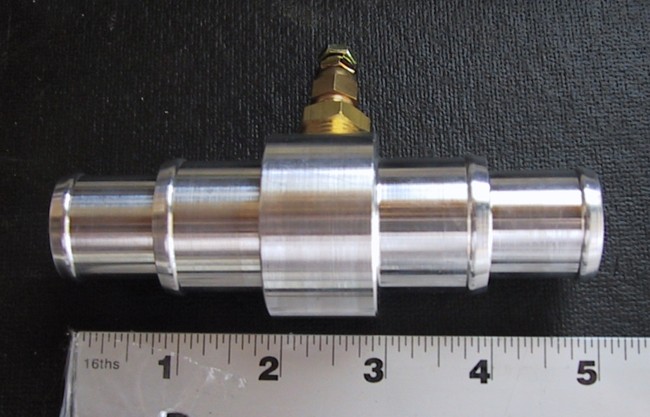
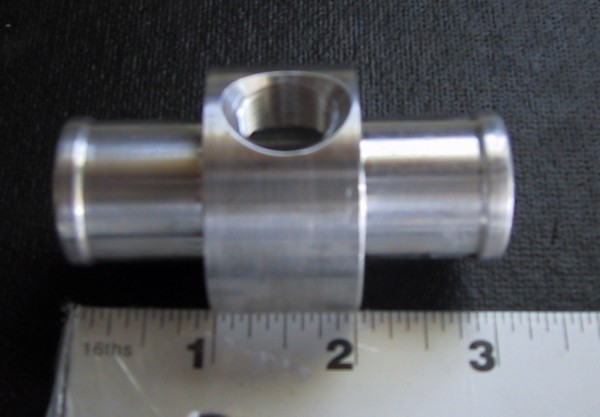
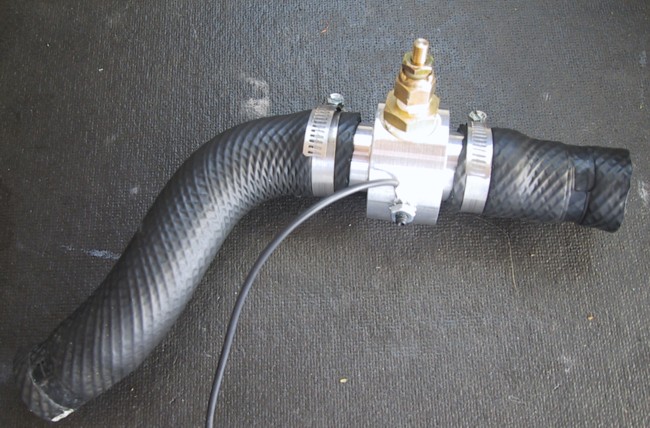
it into the bottom of the radiator (in place of the drain plug). Another solution for Vulcans and one that allows you to keep the warning light is to insert a bypass in one of the water hoses. You have some options here. There is a large ( 1" ID) radiator hose between #1 cylinder and the radiator. This would actually be the most accurate place as the coolant is warmest as it exits the top of the engine. Unfortunately at the engine end this hose is held in place by an "O" ring and the additional weight/stiffness of a bypass 'might' have some effect on the durability of that "O" ring. I'm not sayin' don't use the hose, I'm just providing options ok? Another spot is the radiator hose between the radiator and water pump. This hose puts up with far less vibration than the top hose and is connected to the engine at both ends by a hose clamp. Ah, not ideal but not a bad choice and in the end, my choice. If you can weld or know someone who can, you can make your own bypass from a 1" piece of stainless steel
or aluminum tubing. Just weld a 1/2" piece of tubing to the side of the 1" tubing and tap it for
the temperature sensor or buy a ready made aluminum bypass from Autometer. Part # 2282
What You'll Need 1. Temperature gauge and electronic sensor How to do it 1. See above for prep and actual gauge install 2. Drain engine coolant from the radiator using the drain plug at the bottom of the radiator. If you've done this recently you can collect the coolant and pour it back in later. If it's been awhile just go get 3 quarts of HondaPro coolant (pre mixed) and do the coolant change procedure shown on this Gadget page. 3. Cut a section from whatever hose you've chosen to accommodate your bypass. 4. Install temperature sensor in bypass using Teflon tape to make sure it seals properly 5. Slip bypass into coolant hose 6. Route 18 gauge wire from sending unit to gauge 7. Add coolant to radiator using procedure shown on this Gadget page. 8. Re-connect battery and turn on key. Gauge light should come on and temperature needle shouldn't move. 9. Start engine. Don't be surprised if it takes awhile for the gauge to start showing a reading. The thermostat stays closed (just like your car) until the engine temp is high enough to start circulating coolant. 10. If all is well (temp gauge starts registering) either burp air from the cooling system using the bolt on the fill housing or check your overflow tank to be sure it's full. The radiator will continue to burp air and re-fill itself from the overflow through several heat cycles so be sure to check that overflow tank often your first half dozen rides or so. 11. Gauge registering? |
|
What Should They Read? Now that you have all these spiffy new needles showing you what's happening inside your engine you need to know what they 'should' read so they can actually do you some good. Unfortunately the answers aren't simple. Oil Kawasaki spec is 50 psi + at 2000 rpm and above. Typically you'll see 70-80 psi at highway speeds. Less than 50 psi at 2000 rpm it's time for an engine rebuild. At idle you should see at least 15 psi. Less than that and your idle is too slow, the cams aren't getting lubed properly. Now let me confuse you a little. When you first start your engine you may notice 100 pounds registering. The fact is, the actual pressure will vary depending on temperature and the type oil you use. A multi grade oil (I.E. 10W-40) will usually give you a higher reading when the engine is cold and a lower reading when warmed. A straight weight oil (30W) will give a more consistent reading hot or cold. If you see erratic swings of the gauge it's time to check your oil level. While your idiot light probably never came on to warn you, varying pressure at the same engine speed is a sure sign the level is low. Water This will depend to some extent on where you mounted your sensor. On top of the engine/radiator you're going to see higher temperatures than the cooled water at the bottom. All you really need to know is the fan should turn on at 212-230 degrees. It will turn off between 203 and 217 degrees F. This range is where your engine operates most efficiently. If you fan does not operate in this range there could be a problem with the fan switch in the radiator. Remove and inspect it. If the gauge goes to 230 degrees or higher it's time to begin worrying. This is about where the engine temperature overheat light will come on (spec is 230-248 F). If your new gauge goes to 250 and the overheat light hasn't come on there may be a problem with the bikes sensor. Remove and check it. Voltmeter As mentioned in the installation section, a healthy charging system with a normal load should show 14 volts at 3000 rpm and above. If you're seeing less than this try turning off accessories. If that doesn't help you may have a problem with the alternator. Test it per the bike manufacturers instructions. You can test your accessory load on the charging system (assuming you know all is healthy) by turning on accessories one at a time and noting the gauge. If, at any point the charge falls below 14 volts (remember, it's at 3000 rpm and above) you're putting too much drain on the system and the stator(s) could be in danger. |
![]()


