TallAnnie
TallAnnie's "No Lightbar" Solution For Classics
TallAnnie
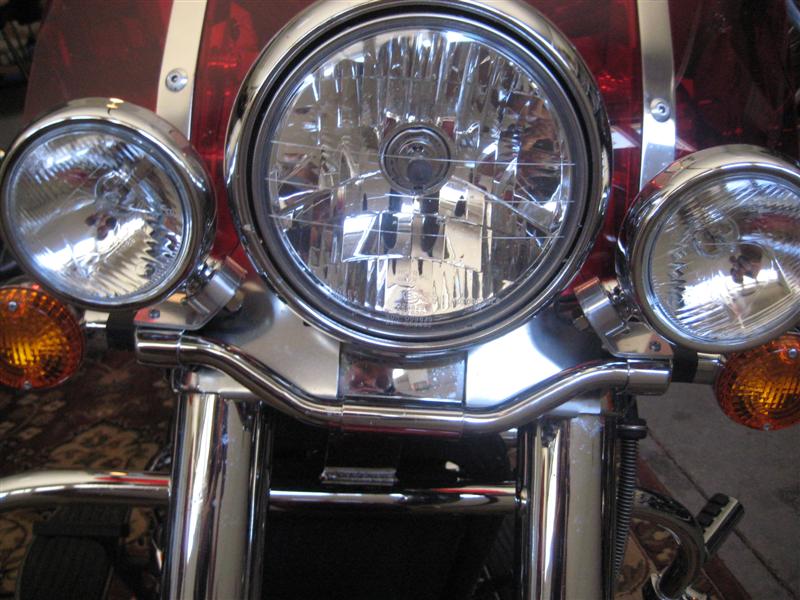
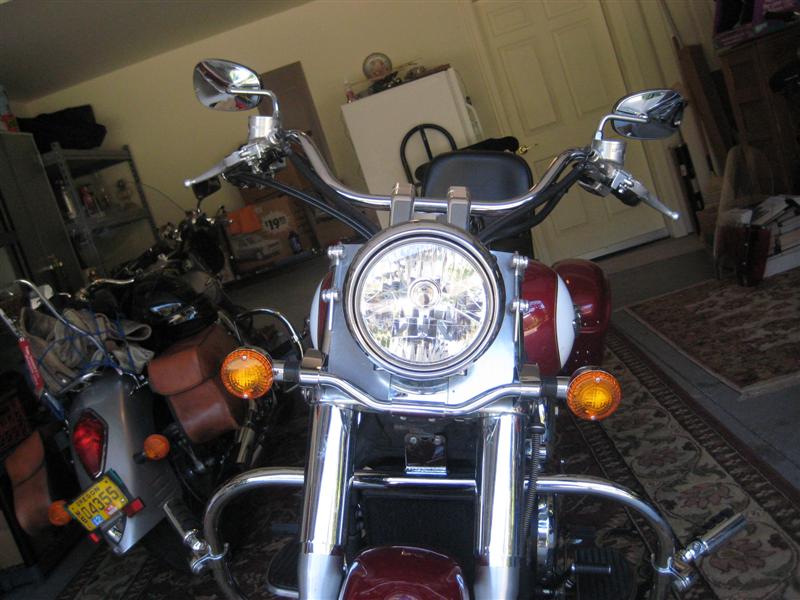
Many Vulcan Classic riders have seen the Kirk's No Lightbar solution for the Nomad and wished they could do the same with their Vulcan Classic. The problem has been with the one-inch narrower fork on the Classic that made it impossible unless the owner went with a smaller than standard housing. TallAnnie to the rescue! She has created a very simple bracket that allows mounting spot/fog lights on the Classic avoiding the expense of a commercial lightbar.
What You'll Need
1- Vulcan Classic with stock
turn signal mounts
2- Spotlights. Parts shown below are 4.5 inch spots purchased from "BKRider store" on Ebay for $24 each. Part number C01050295. Spots are available in many styles and over a huge price range.
1- Piece of aluminum or stainless steel flat stock available at any hardware store
2- Spacers available at most hardware stores
1- 12 V 30 amp relay and wiring.
1- Optional switch
How To Do It
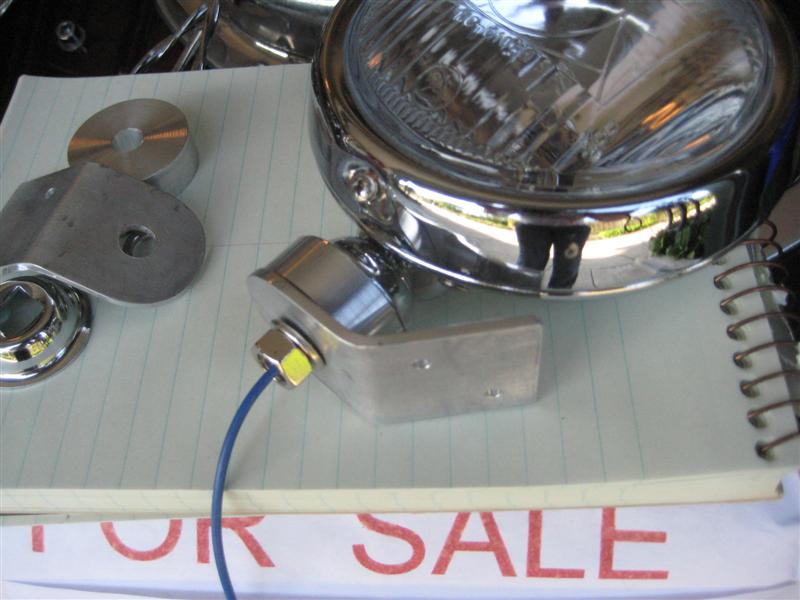
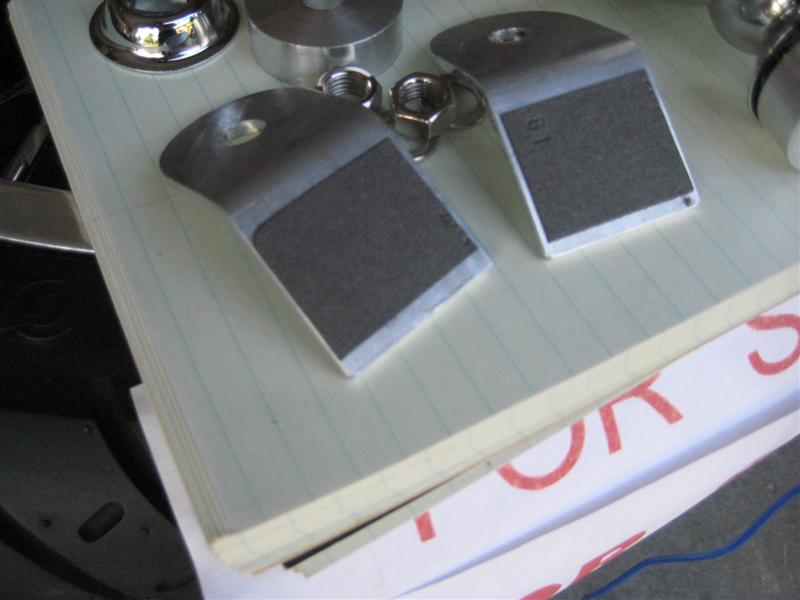 We start with brackets. as shown at left They're very simple to make from
your choice of materials. The pieces shown are aluminum, stainless steel
would work great too. To create the brackets grab a piece of heavy
cardboard. Place the cardboard on the turn signal bar and draw the size
you need freehand. You can get the angle by holding your accessory
light
against the cardboard. There's going to be a little trial and error here
which is why you're using paper. Once you have your pattern transfer it to
metal.
We start with brackets. as shown at left They're very simple to make from
your choice of materials. The pieces shown are aluminum, stainless steel
would work great too. To create the brackets grab a piece of heavy
cardboard. Place the cardboard on the turn signal bar and draw the size
you need freehand. You can get the angle by holding your accessory
light
against the cardboard. There's going to be a little trial and error here
which is why you're using paper. Once you have your pattern transfer it to
metal.
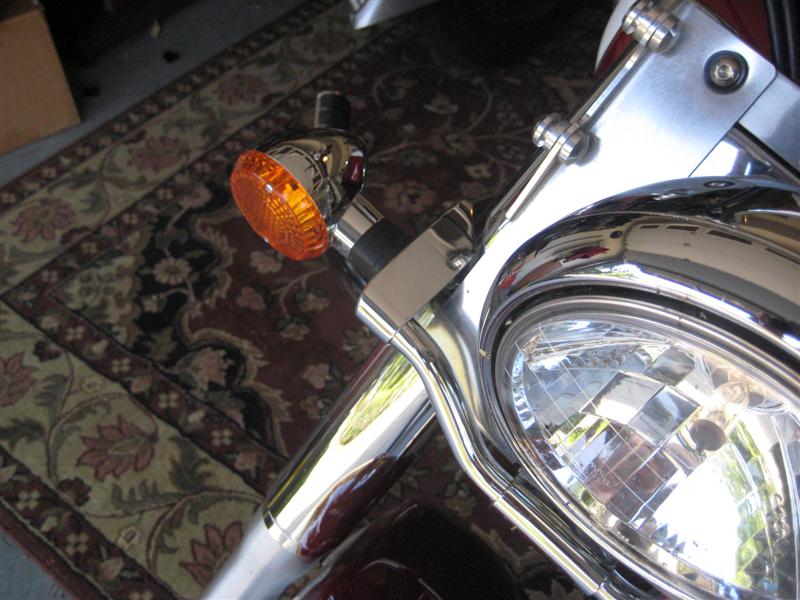
 I took the windshield off the bike and then center punched (pic right) and
drilled matching holes in the OEM chrome turn signal bar near each turn
signal. (The diagonal pattern came from observing where there are
obstructions under the piece). A test fit or two before drilling will go a
long way here.
I took the windshield off the bike and then center punched (pic right) and
drilled matching holes in the OEM chrome turn signal bar near each turn
signal. (The diagonal pattern came from observing where there are
obstructions under the piece). A test fit or two before drilling will go a
long way here.
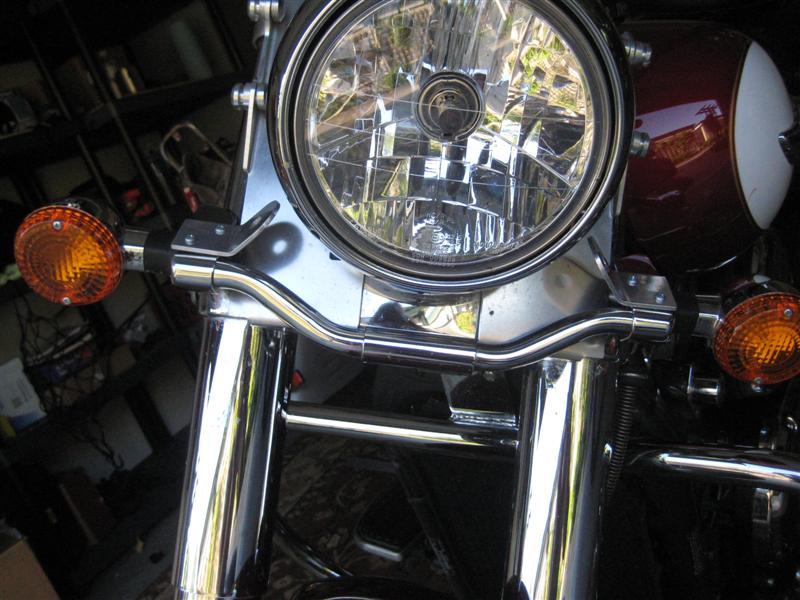
 I placed gasket material between the chrome and the new aluminum brackets
and then realized that I didn't have enough clearance underneath to put the
nut on my bolts... :(. I found some short self tapping screws the right
size and mounted the brackets snug and tight down on the gasket. If it
ever loosens up, I would have to move these holes
a bit to use locknuts, but the bracket would cover that. Seems really
tight to me.
I placed gasket material between the chrome and the new aluminum brackets
and then realized that I didn't have enough clearance underneath to put the
nut on my bolts... :(. I found some short self tapping screws the right
size and mounted the brackets snug and tight down on the gasket. If it
ever loosens up, I would have to move these holes
a bit to use locknuts, but the bracket would cover that. Seems really
tight to me.
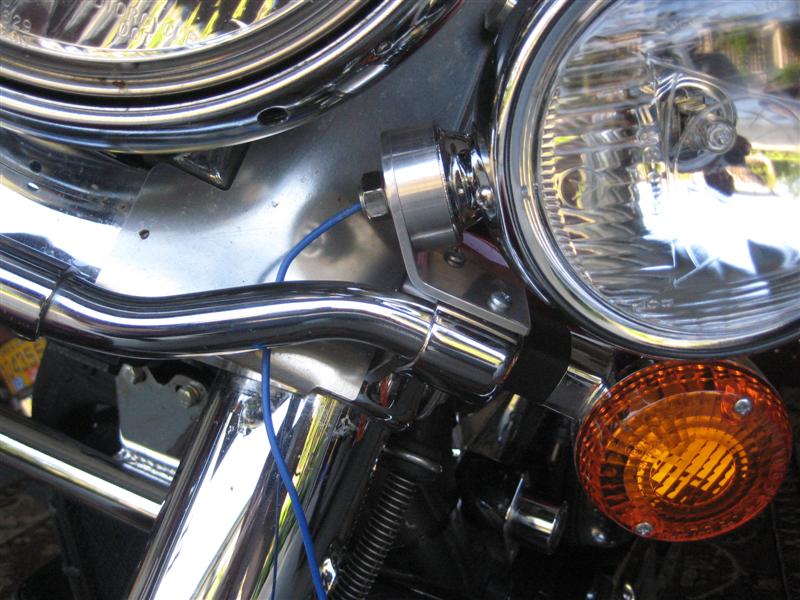
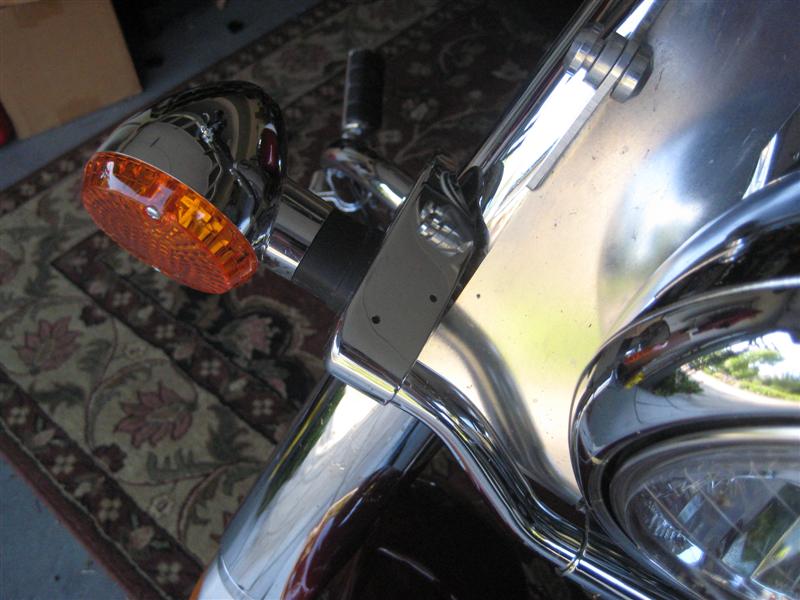
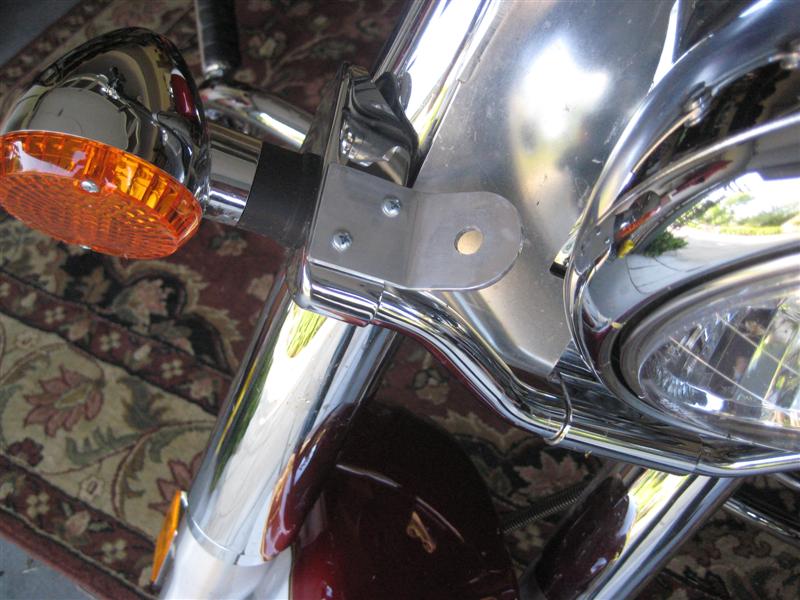
 Now I assembled each light in its bracket and snugged them down. I
slipped heat shrink over the blue hot wires to hide the color and to provide
some protection. I routed the wires along the turn signal wire route from
each side up into the headlight bucket..
Now I assembled each light in its bracket and snugged them down. I
slipped heat shrink over the blue hot wires to hide the color and to provide
some protection. I routed the wires along the turn signal wire route from
each side up into the headlight bucket..
Now ....where the heck was power ? On the schematic
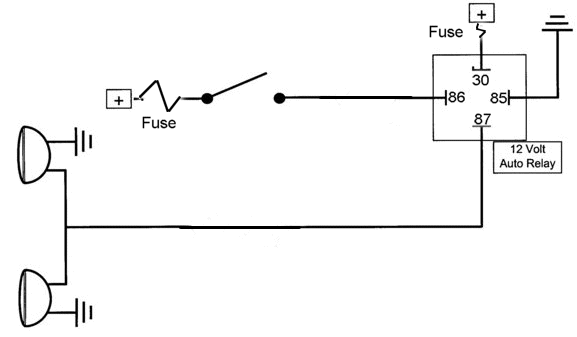 I saw that there is a 10a fused 'aux" set of connectors on my bike.
Somewhere else in gadgetland I read that mine (1500) is under the gas
tank....*sigh*. So....off came the gas tank. If you own a 1600 the aux
power is in the headlight bucket. As I raised the front of the tank after
all the disconnections made, I saw the blue/white wire .....so I simply
propped the tank up with a 2x4 piece of wood enough to work on the connector
without having to unconnected the gas lines further back. I found that a
round crimp type wire connector slips perfectly and very tightly into the round
female ends of the OEM aux connector....so I ran a wire from there up to the
headlight bucket..... tie wrapping it to the big wire bundle on the left
side of the bike....and then I reassembled the gas tank.
I saw that there is a 10a fused 'aux" set of connectors on my bike.
Somewhere else in gadgetland I read that mine (1500) is under the gas
tank....*sigh*. So....off came the gas tank. If you own a 1600 the aux
power is in the headlight bucket. As I raised the front of the tank after
all the disconnections made, I saw the blue/white wire .....so I simply
propped the tank up with a 2x4 piece of wood enough to work on the connector
without having to unconnected the gas lines further back. I found that a
round crimp type wire connector slips perfectly and very tightly into the round
female ends of the OEM aux connector....so I ran a wire from there up to the
headlight bucket..... tie wrapping it to the big wire bundle on the left
side of the bike....and then I reassembled the gas tank.
I righted the bike, aimed them at the garage door and aligned them and tightened everything down. Overall, it took me about 2 hours....(I had never removed a gas tank before)....but I love the look now ! and have the pleasure of knowing I made it myself !
![]()