Click For Larger Image
Build a Trailer U-can pull with your bike (or small car)
Click For Larger Image
At some point you've probably wondered to yourself....."self, I'd love to have a little extra space for hauling 'stuff' home from the swap meet or the outlet mall or for camping but trailers are sooooo expensive! Is there a solution?" Well wonder no more because there is.
All you need is a light duty trailer (#42708 860 pound capacity) sold by Harbor Freight and your choice of car top carriers. You can order the trailer from the online catalog . Shipping (at this writing) is free and you'll only be charged tax if you live in California. If there's a Harbor Freight store in your area, you should still check the web page for possible sale pricing and the store will honor the web (catalog) price.
Before you buy, read through the following instructions and see if you really want to assemble your own trailer (it can be done in as little as an afternoon or weeks depending how much you want to put into the project)
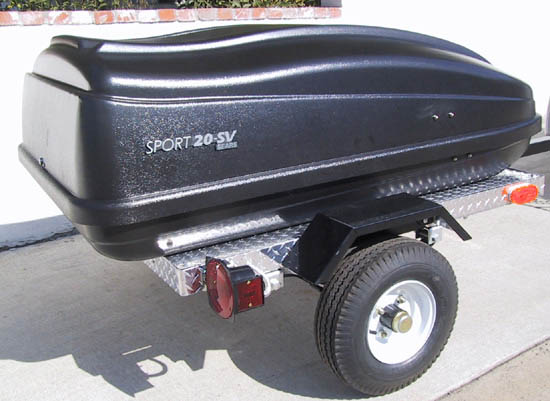
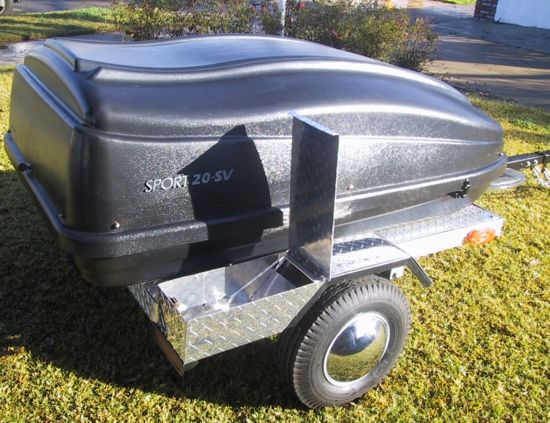
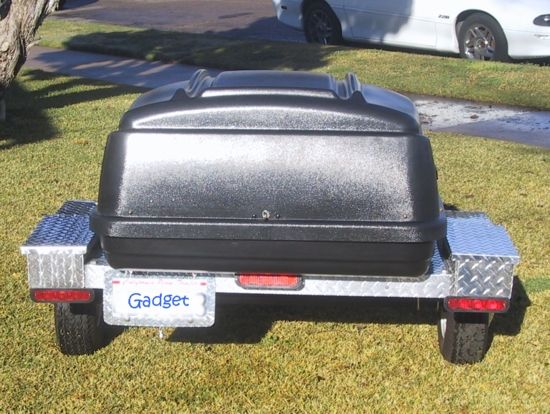
Here's a photo montage of my project trailer: 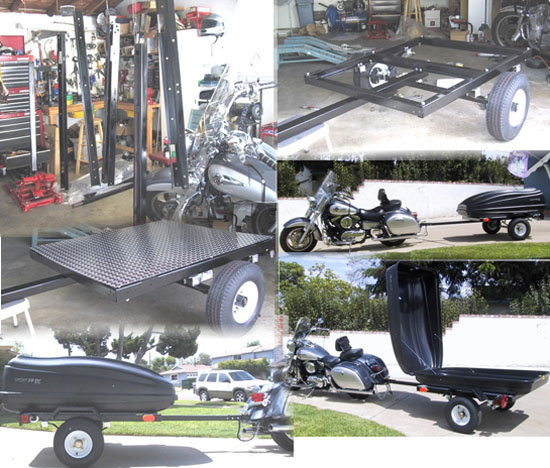
In the upper left corner you'll see frame pieces hanging from my garage rafters. They're being painted black. You will need a minimum of two rattle cans of primer and two cans of enamel in the color of your choice. While you're at the hardware store, buy three cans of color. You can always take the extra can back. I used a single can of clear over the black. This is optional (and requires several extra hours of patience while the clear dries). The trailer out of the box is red. If that color works for you you'll save two days of cleaning, sanding, priming, painting and waiting for the enamel to dry (frustrating).
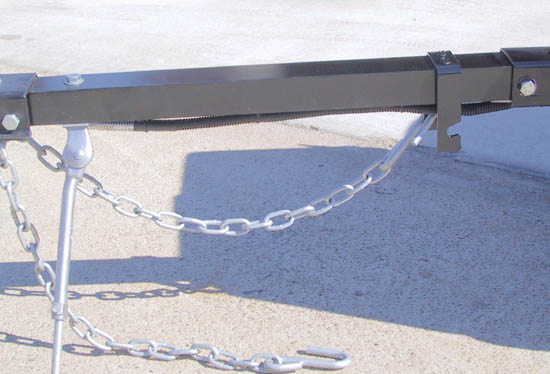
In the upper right corner you'll see the trailer kit bolted together. This is what you'll have out of the box. A frame, two wheels and a tongue. Note, after taking the picture I moved the center brace forward to the next set of holes (pre-drilled) in the frame to provide an extra 10" or so of tongue length. Others who've done this project report the extra length really makes a huge difference in the way the trailer handles behind a bike. It's far less sensitive to weight distribution and gives you some extra space to mount a cooler if you'd like. I also opted to clean the pre-lubricated wheel bearings thoroughly with solvent and re-pack with Mobil-1 Synthetic grease. Why? Because the lube in the bearings appears to be little more than Vaseline. Same color, same scent, same texture. You should really plan on repacking the bearings with a high quality grease. While you're working in the wheel area (preferably before you assemble the spring shackle) cut a piece of 1/2" ID auto heater hose (or garden hose) to fit inside the rear shackle and press the 1/2" bolt through the hose. This will cut down on some of the rattle made by the trailer as it goes over bumps. Another option (which I exercised) is removal of the smaller leaf spring. You'll be carrying less than half what the trailer is rated for and don't really need the extra stiffness. You might want to pull the trailer a bit with the spring in place then remove later if it's bouncing around a lot.
Middle left you'll see I chose to cover the frame with aluminum diamond plate. This not only stiffens the
trailer frame but really looks terrific. I'm fortunate to have a metal supply outlet in the area that sells this
stuff by the pound. a 48x48 sheet of .063 (1/16" thick) cost $32.00. This particular frame needs a 48x40 sheet
and the cut cost another five bucks. Call it $40 and now the project is up to $179.00 (plus about $10 for paint
if you elected to go that route). BTW attaching the aluminum (or whatever you choose to use) is easy and looks
great using 1/4" stainless steel button head bolts  with nylock (self locking) nuts.
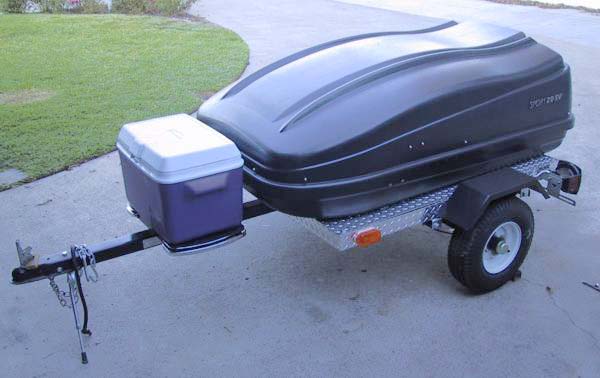
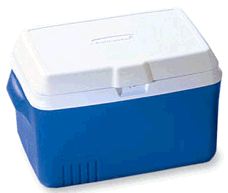
Middle right you'll see I've mounted a Sears 20 Cubic Foot cargo box to the frame. There are plenty of other options out there. Prices range from $10 at garage sales to $200 plus for really fancy (and very well built) boxes. You could even build your own out of whatever materials you feel comfortable working with. Keep in mind the watch word for this particular project is "weight". We want as little as possible so you can haul more 'stuff' behind your bike. The cargo box pictured is the Sears X-Cargo 20 cubic foot model. On sale I got it for $159. Total cost for the project now has hit $338.00 but remember you can use other cargo boxes. I found 18 cubic foot units at Pep Boys for under 70 dollars. Keep it simple and the trailer plus a new box could total just over $200.
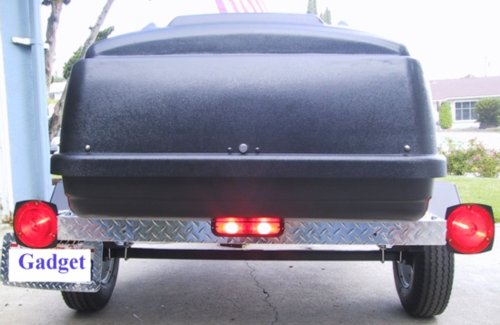
Bottom right you'll see I have used some light duty chain to keep the lid from falling all the way forward.
This particular box has a couple of limiting latches that only allow the box to open about 30 degrees. It's tough
getting stuff in and and out. I just drilled out the rivets holding those latches and, using 1/2 inch x 1/4 bolts,
some S-hooks and chain set the lid up so it could be opened fully. 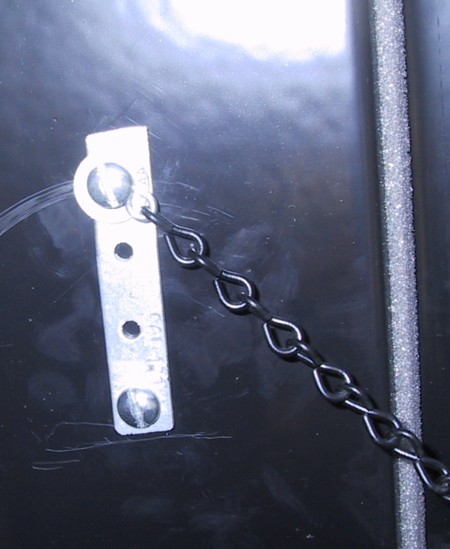 Cost, about $10
for chain and hardware.
Cost, about $10
for chain and hardware.
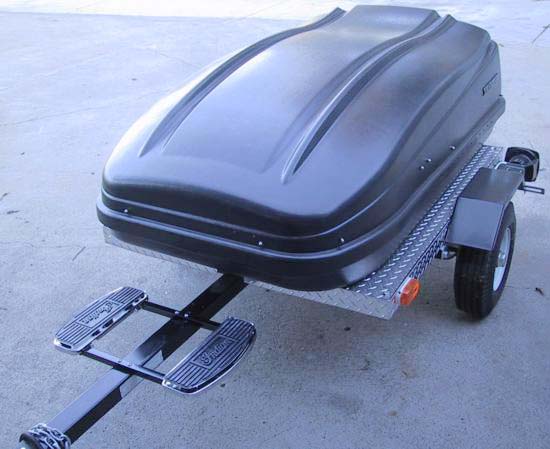
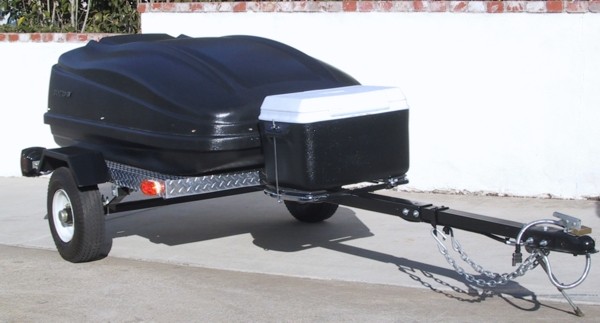
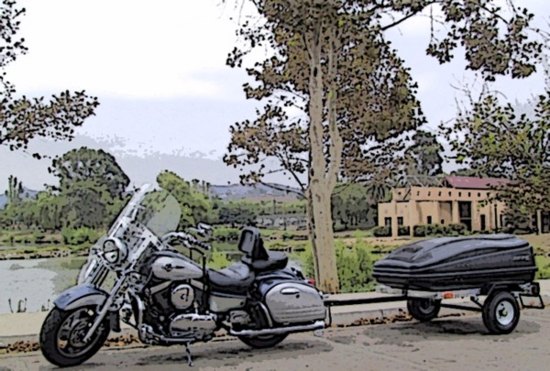
Bottom left the trailer is ready for its maiden voyage, hitched (HitchDoc) to my Nomad. The trailer pulled
great but the cargo box rattled a lot. That little problem was fixed with a roll of foam weather stripping which
I ran around the lip in the lid. End of rattle. I still have some improvements in mind like using the left over
diamond plate to trim the frame, maybe some baby moon hub caps and (those who know me would have guessed this first)
some addtional lighting. Speaking of which, it just won't do to have a bunch of naked wiring hanging
out in public. 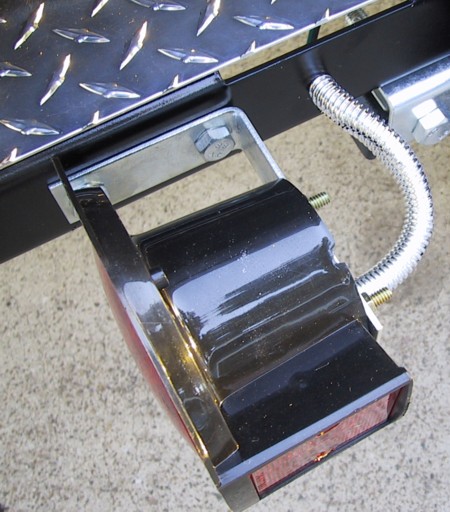
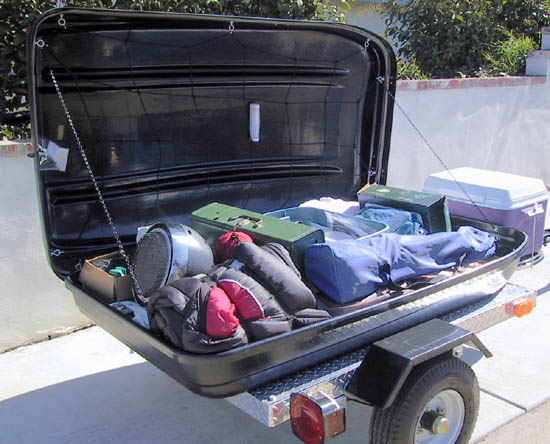
With my 80 pounds of camping gear plus 50 pound (loaded with food and ice) cooler, 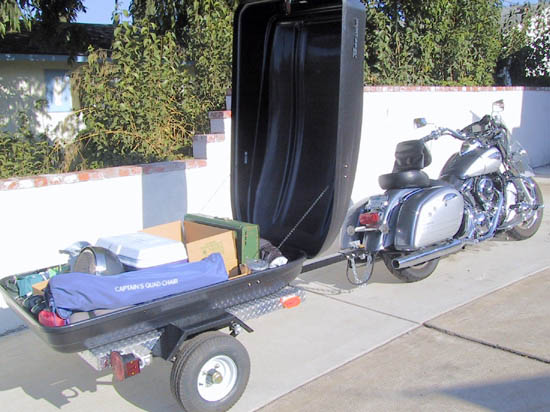 the trailer weighs 290 pounds. Within the 1/3 of loaded bike weight recommended by veteran trailer haulers and
for around $200 (plus hitch) a huge bargain compared to most commercial trailer offerings.
the trailer weighs 290 pounds. Within the 1/3 of loaded bike weight recommended by veteran trailer haulers and
for around $200 (plus hitch) a huge bargain compared to most commercial trailer offerings.
Sweating Some Details
If you have a label maker (or know someone who does) it will help to have some information all in one spot
like Trailer weight, tire pressure, lug nut torque etc. ![]() (I know, blame the
itty bitty buttons on the label maker for the wrong weight total. It's fixed now)
(I know, blame the
itty bitty buttons on the label maker for the wrong weight total. It's fixed now)
Ready To Roll! (click thumbnails for larger images)
So, what do you need for this little project?
1- Harbor Freight #42708 48x40 single tongue trailer Normal price for this trailer is $189 but Harbor Freight ( or your local dealer) often put it on sale.
Your choice of custom touches from Diamond Plate to lighting, the sky is the limit. But always be thinking "weight,
weight, weight."
Now, go camping, go shopping just "GO". Once you've pulled a trailer behind your bike or small car you'll wonder why you didn't do it a long time ago.
Cheers
Gadget
1. Add another fixture on each side for turn signals and wire direct from your bike wiring. This works best if you're using LEDs for the trailer lighting due to the amount of power being pulled through the bike's wiring for the trailer lighting. Wiring this way practically guarantees you'll have to uprate your tail/brake light fuse from (usually) 10 amps to 15 amps. Doing that runs the risk of turning a weak spot in the bike's wiring harness into a fuse with potentially catastrophic results.
Another Idea
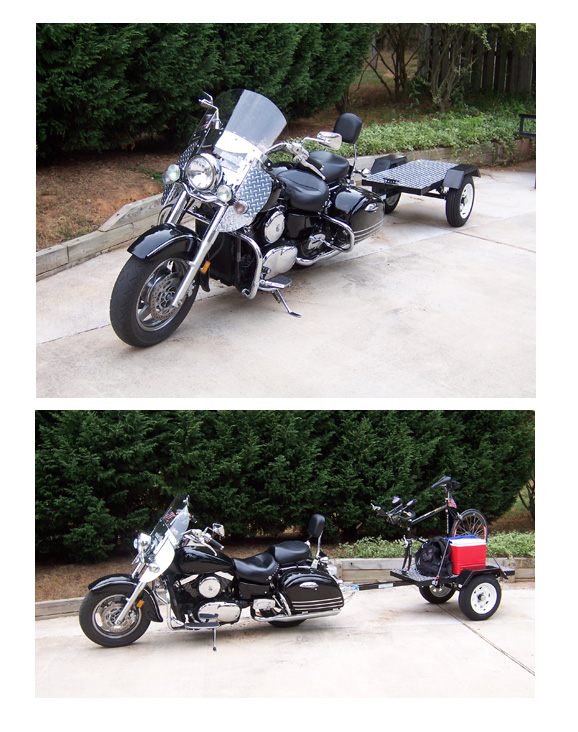 How
about this option for those who don't really need a 'tub' to carry things
around. Rick Greif cut the Harbor Freight trailer down to 30"
(tire center to center) and uses it to carry his 21 pound triathlon bike, a tent
and other race gear.
How
about this option for those who don't really need a 'tub' to carry things
around. Rick Greif cut the Harbor Freight trailer down to 30"
(tire center to center) and uses it to carry his 21 pound triathlon bike, a tent
and other race gear.
![]()